그림자 표현하기
그림자를 표현하기 위해서는 물체와 조명의 각도, 그림자의 크기, 형태 등의 상호작용 연산이 필요합니다.
그래서 Three.js 의 그림자 설정의 기본값은 모두 미사용으로 설정되어 있습니다.
이 덕분에 개발자가 원하는 조명과 원하는 물체의 그림자를 직접 지정하여 표현할 수 있습니다.
예시 코드
이전 포스팅에서 바닥(땅) 을 만들었던 코드에 그림자 설정을 추가해 보겠습니다.
import {
    WebGLRenderer,
    Scene,
    PerspectiveCamera,

    Mesh,
    MeshStandardMaterial,
    SphereGeometry,
    PlaneGeometry,

    Color,
    HemisphereLight,
    HemisphereLightHelper,
    DirectionalLight,
    DirectionalLightHelper,
} from 'three';
import {
    OrbitControls,
} from 'three/examples/jsm/controls/OrbitControls';
import './style.css';

/** @type { WebGLRenderer } */
let renderer;

/** @type { Scene } */
let scene;

/** @type { PerspectiveCamera } */
let camera;

/** @type { OrbitControls } */
let controls;

function initCanvas() {
    const $canvas = document.createElement('canvas');
    $canvas.width = window.innerWidth;
    $canvas.height = window.innerHeight;

    const $app = document.querySelector('#app');
    $app.appendChild($canvas);

    return $canvas;
}

function initScene() {
    scene = new Scene();
}

function initCamera() {
    camera = new PerspectiveCamera();
    camera.fov = 35;
    camera.aspect = window.innerWidth / window.innerHeight;
    camera.position.set(0, 0, 12);

    camera.updateProjectionMatrix();
}

function initControls($canvas) {
    controls = new OrbitControls(camera, $canvas);
    controls.enableDamping = true;
}

function initHemisphereLight() {
    const skyColor = new Color('#fff');
    const groundColor = new Color('#000');
    const light = new HemisphereLight(
        skyColor,
        groundColor,
        0.75
    );

    const helper = new HemisphereLightHelper(light);

    scene.add(light);
    scene.add(helper);
}

function initDirectionalLight() {
    const color = new Color('#fff');
    const light = new DirectionalLight(color);
    light.position.set(2, 2, 2);

    const helper = new DirectionalLightHelper(light);

    scene.add(light);
    scene.add(helper);
}

function initSphereMesh() {
    const geometry = new SphereGeometry();
    const material = new MeshStandardMaterial();
    const sphere = new Mesh(geometry, material);

    scene.add(sphere);
}

function initPlaneMesh() {
    const geometry = new PlaneGeometry(10, 10);
    const material = new MeshStandardMaterial();
    const plane = new Mesh(geometry, material);
    plane.position.set(0, -1, 0);
    plane.rotation.set(
        Math.PI * -0.5,
        0,
        0
    );

    scene.add(plane);
}

function initRenderer($canvas) {
    renderer = new WebGLRenderer({
        canvas: $canvas,
        antialias: true,
    });
}

function render() {
    window.requestAnimationFrame(render);

    renderer.render(scene, camera);
    controls.update();
}

(function init() {
    const $canvas = initCanvas();
    initRenderer($canvas);
    initScene();
    initCamera();
    initControls($canvas);

    initHemisphereLight();
    initDirectionalLight();

    initSphereMesh();
    initPlaneMesh();

    render();
}());
그림자 종류
Three.js 에서 제공하는 그림자는 크게 2가지로 볼 수 있습니다.
- Hard Shadow: 선명하며 거친 그림자를 표현합니다.
- Soft Shadow: 부드러운 그림자를 표현합니다.
Soft Shadow 는 그림자에 Blur 를 적용하여 부드럽게 표현합니다.
주의할 점은 Blur 값을 크게 설정할수록 부드럽게 표현하지만, 사용자 PC 의 연산량이 커진다는 것 입니다.
Three.js 의 그림자 설정은 다음과 같은 과정으로 만들 수 있습니다.
- Hard Shadow 설정하기
- Soft Shadow 설정 추가하기
그림자 설정이 필요한 인스턴스들
그림자를 표현하려면 몇가지 설정을 함께 해주어야 합니다.
아래는 그림자 설정이 필요한 인스턴스들 입니다.
- WebGLRenderer 인스턴스
- Light 인스턴스
- Mesh 인스턴스
WebGLRenderer 에 shadow 설정하기
WebGLRenderer 는 ShadowMap 이라는 메커니즘을 제공합니다.
지금은 컴퓨터 그래픽스에서 그림자를 표현하는 여러 알고리즘 중 한가지 라는 것 정도로 정리하고자 합니다.
- WebGLRenderer shadowMap 은 그림자를 이미지로 생성한 후, 그림자를 씌우는 방식으로 동작합니다.
아래 코드는 WebGLRenderer 가 그림자를 표현하도록 설정합니다.
function initRenderer($canvas) {
    renderer = new WebGLRenderer({
        canvas: $canvas,
        antialias: true,
    });

    renderer.shadowMap.enabled = true;
}
Light 와 Mesh 의 그림자 설정 (Hard Shadow)
Light 와 Mesh 의 그림자 설정 속성은 동일한 인터페이스를 가집니다.
그림자 설정 속성은 크게 두가지가 있습니다.
- 그림자를 만들어내는 설정:
castShadow - 다른 Mesh 의 그림자를 받는 설정:
receiveShadow
Light 가 비추는 빛은 다른 Mesh 에 의해 그림자를 생성하게 됩니다.
그러므로 Light 의 castShadow 를 true 로 설정해줍니다.
function initDirectionalLight() {
    const color = new Color('#fff');
    const light = new DirectionalLight(color);
    light.position.set(2, 2, 2);
    light.castShadow = true;

    const helper = new DirectionalLightHelper(light);

    scene.add(light);
    scene.add(helper);
}
빛에 의해 그림자를 만들어내는 Mesh 역시 그림자를 생성하므로, caseShadow 를 true 로 설정해줍니다.
function initSphereMesh() {
    const geometry = new SphereGeometry();
    const material = new MeshStandardMaterial();
    const sphere = new Mesh(geometry, material);
    sphere.castShadow = true;

    scene.add(sphere);
}
바닥(땅) 을 표현한 Plane Mesh 는 다른 Mesh 의 그림자를 받게 되므로, receiveShadow 를 true 로 설정해줍니다.
function initPlaneMesh() {
    const geometry = new PlaneGeometry(10, 10);
    const material = new MeshStandardMaterial();
    const plane = new Mesh(geometry, material);
    plane.position.set(0, -1, 0);
    plane.rotation.set(
        Math.PI * -0.5,
        0,
        0
    );

    plane.receiveShadow = true;

    scene.add(plane);
}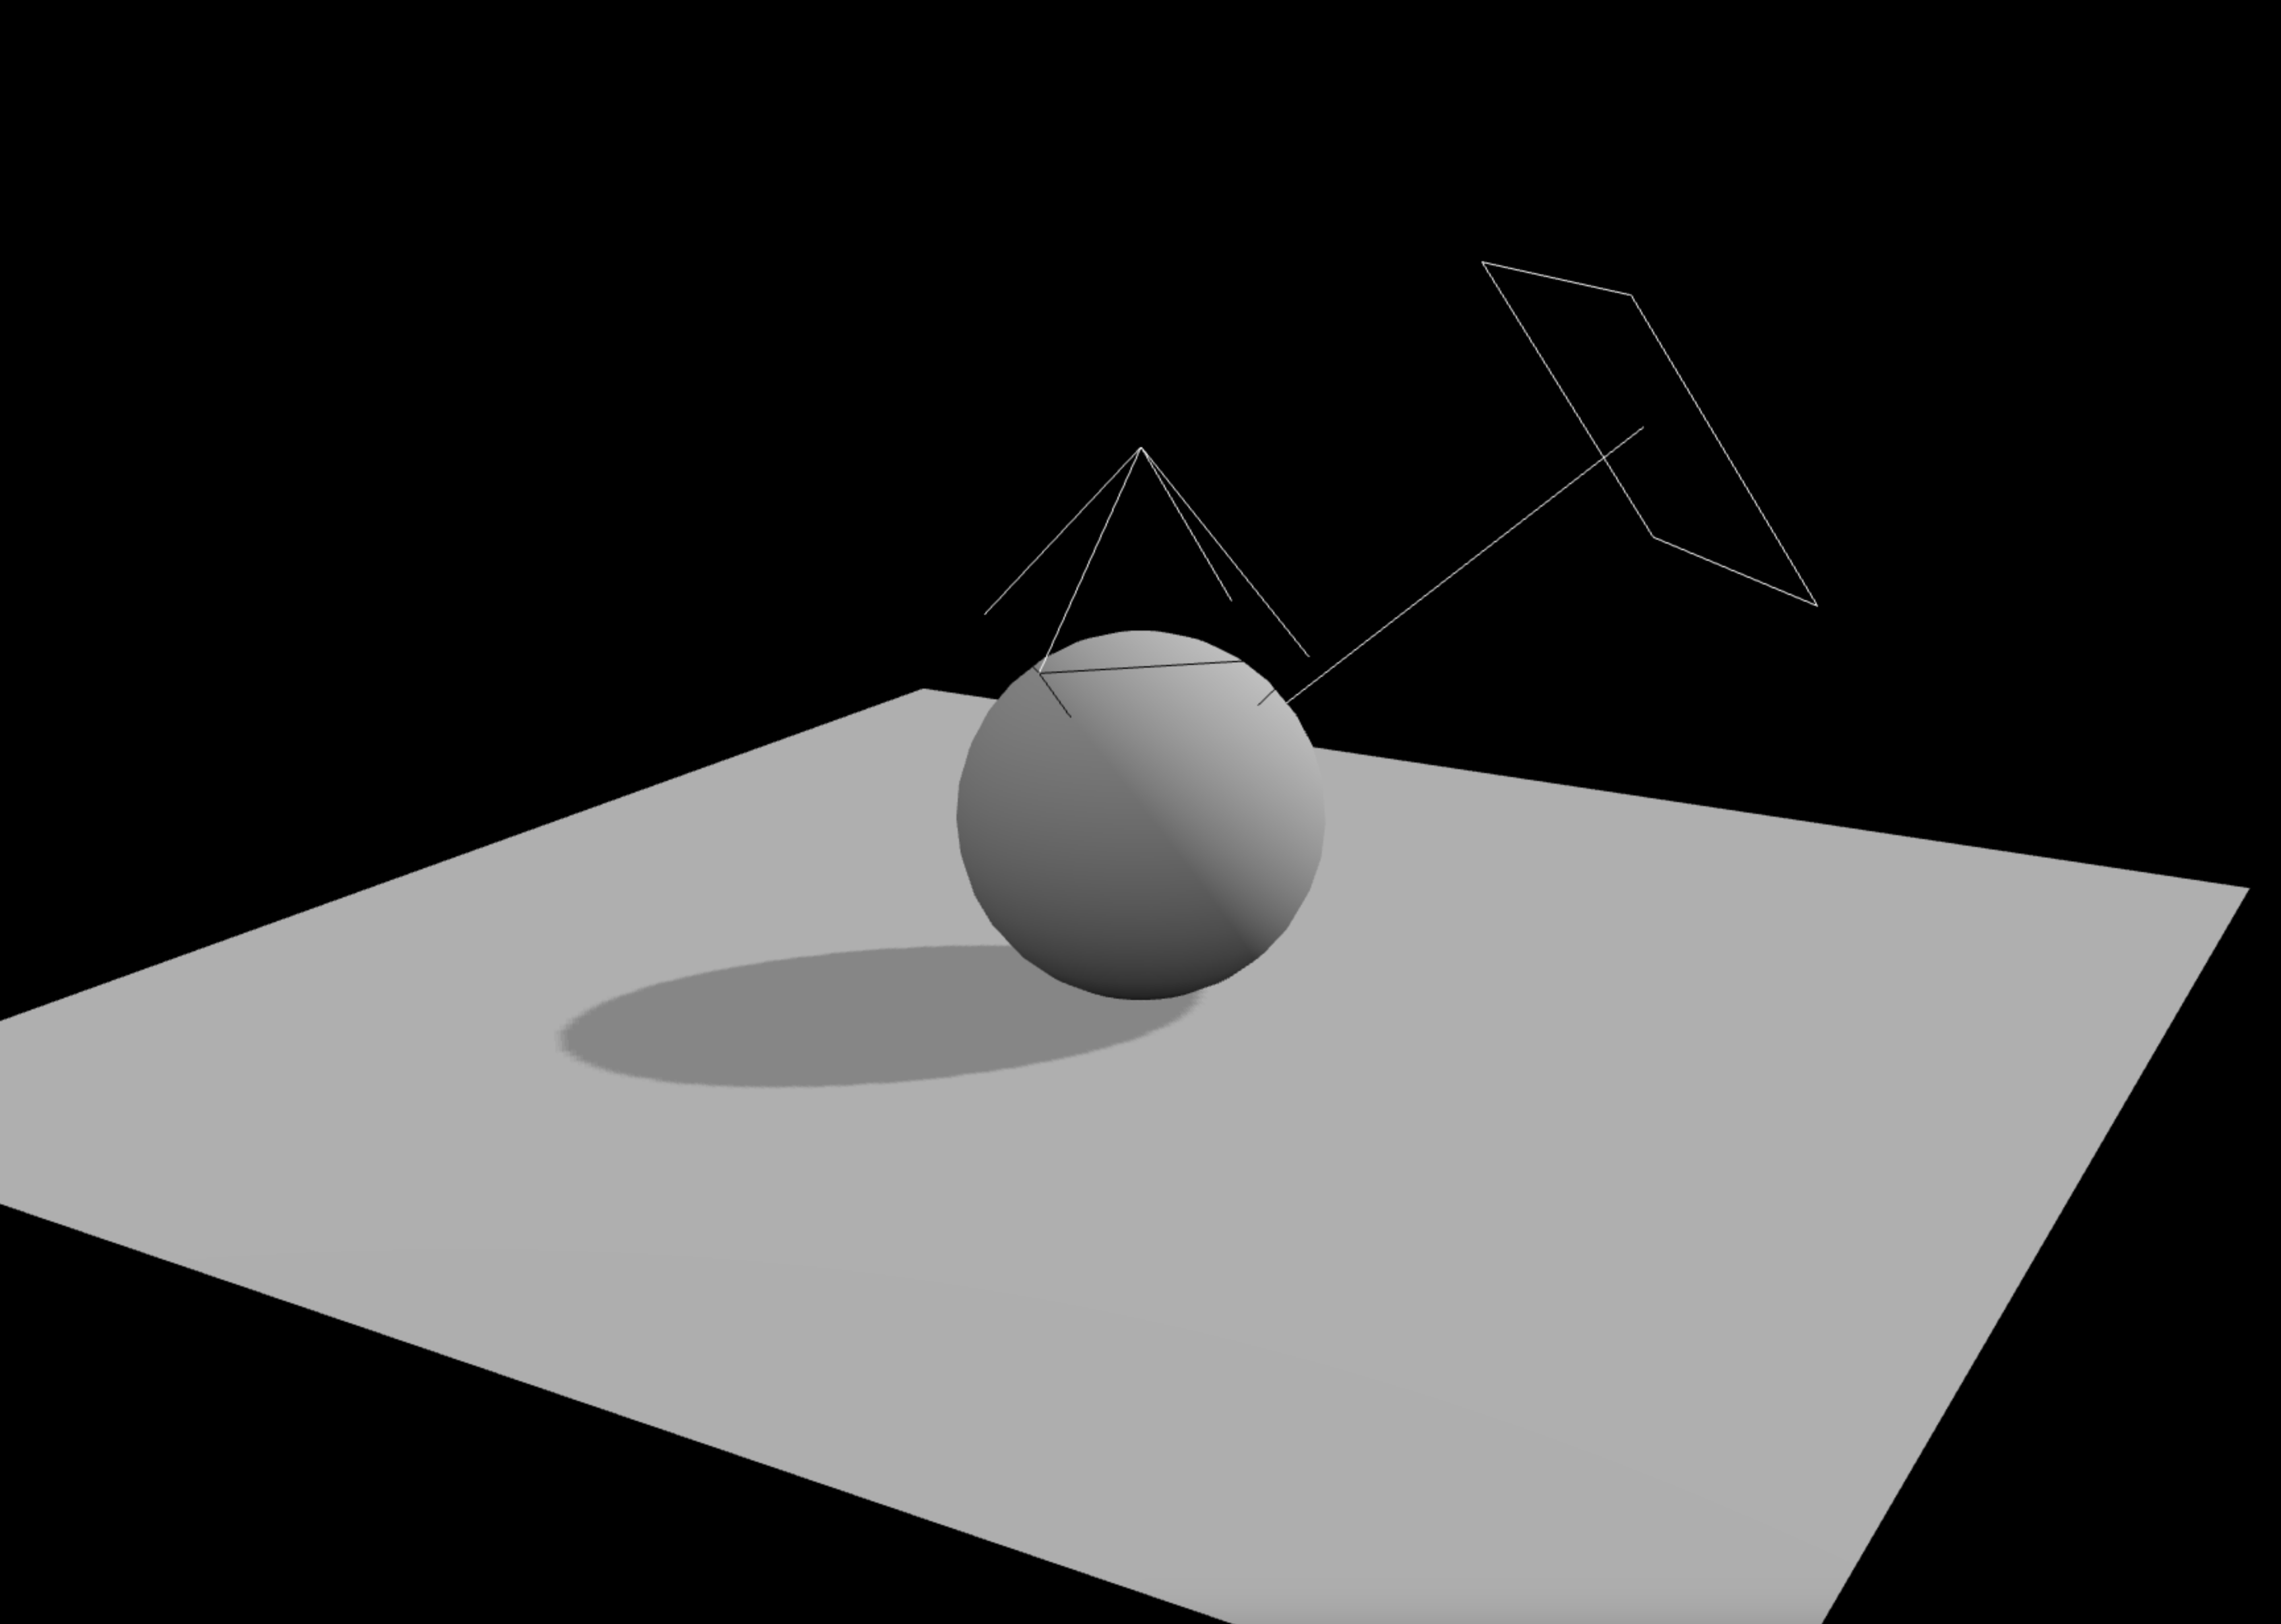
지금까지 설정하여 만들어낸 그림자는 Hard Shadow 입니다.
Blur 처리를 하지 않기 때문에 선명한 그림자가 그려지고, 곡선에서 픽셀이 보이는 특징이 있습니다.
Soft Shadow 설정 추가하기
Hard Shadow 설정을 한 후, WebGLRenderer 의 shadowMap.type 을 VSMShadowMap 으로 설정하므로써 Soft Shadow 로 표현됩니다.
import {
    WebGLRenderer,
    Scene,
    PerspectiveCamera,

    Mesh,
    MeshStandardMaterial,
    SphereGeometry,
    PlaneGeometry,

    Color,
    HemisphereLight,
    HemisphereLightHelper,
    DirectionalLight,
    DirectionalLightHelper,
    VSMShadowMap,
} from 'three';function initRenderer($canvas) {
renderer = new WebGLRenderer({
canvas: $canvas,
antialias: true,
});
renderer.shadowMap.enabled = true;
renderer.shadowMap.type = VSMShadowMap;
}위 코드에서 사용한 VSMShadowMap 이외에도 다른 종류의 shadowMap 을 사용할 수도 있습니다. (이번 포스팅에서는 VSMShadowMap 을 사용합니다.)
Three.js 공식 문서 - WebGLRenderer.shadowMap
- BasicShadowMap
- PCFShadowMap (default)
- PCFSoftShadowMap
- VSMShadowMap
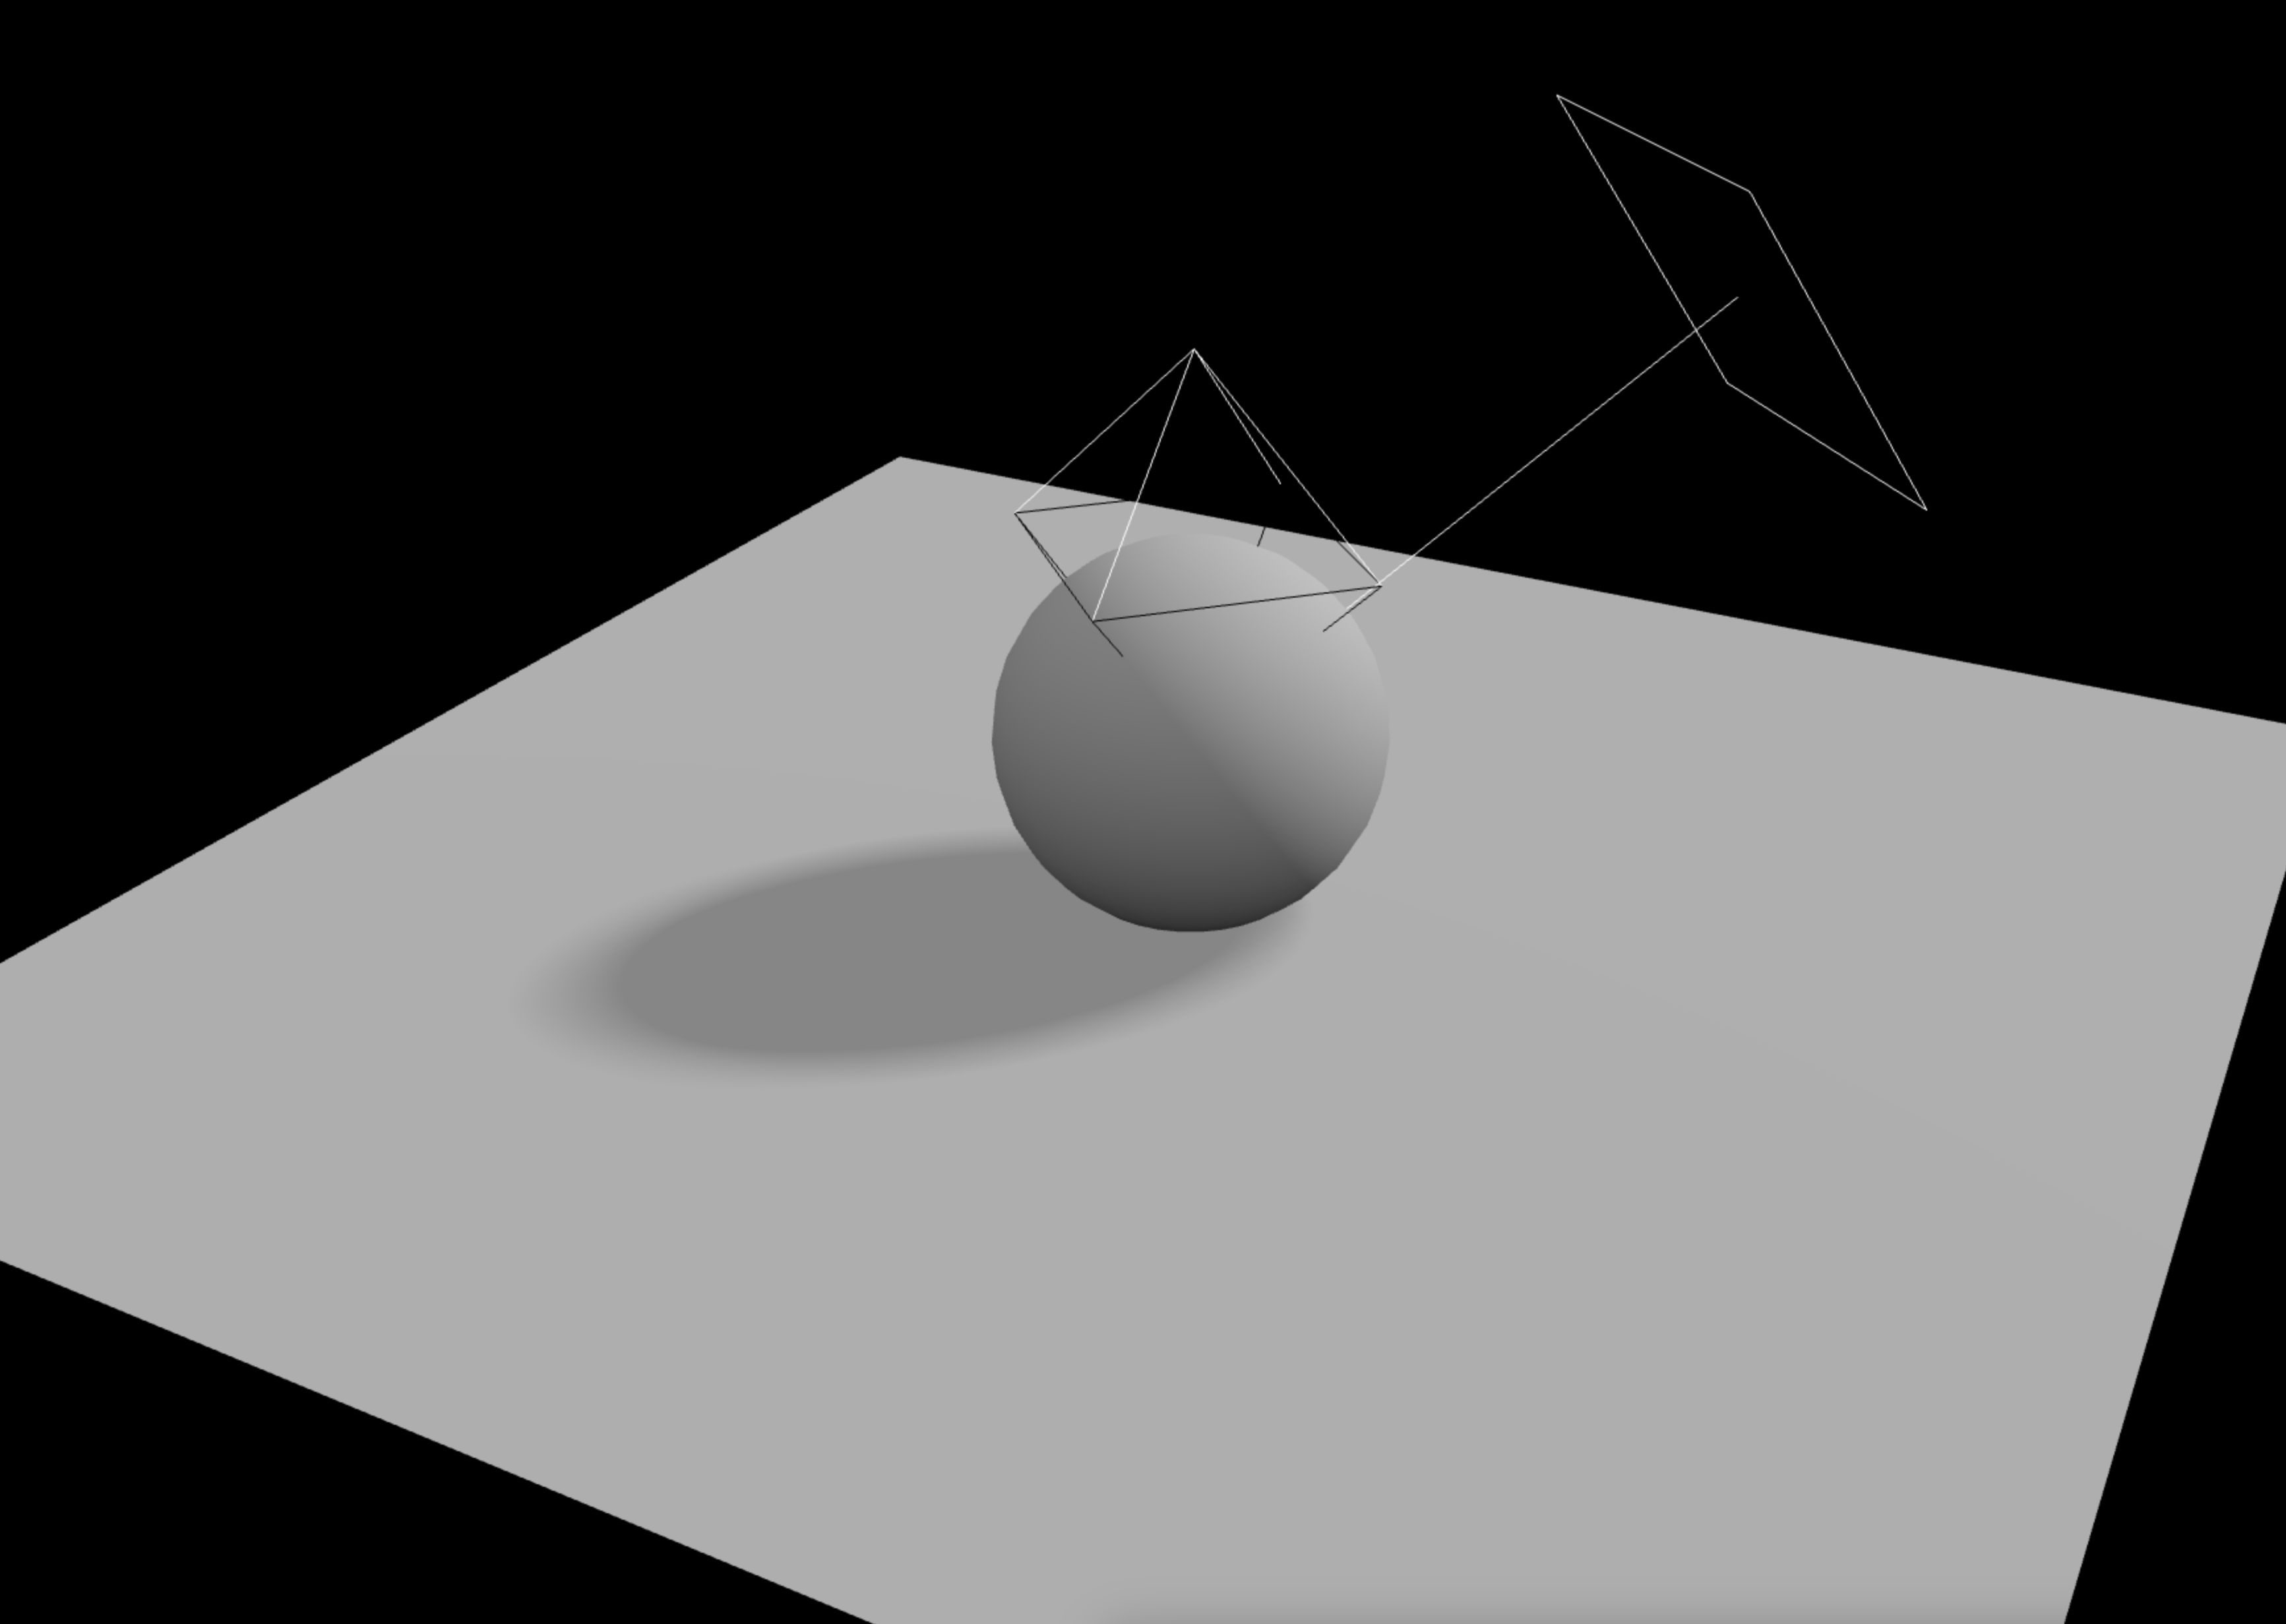
위 설정을 추가한 후, 결과를 확인하면 Hard Shadow 와 다른점이 없어 보입니다.
이는 그림자를 생성하는 Light 의 Blur 정도 와 번지는 영역의 Radius 를 변경하면서 부드러움이 달라지는 것을 확인할 수 있습니다.
function initDirectionalLight() {
    const color = new Color('#fff');
    const light = new DirectionalLight(color);
    light.position.set(2, 2, 2);
    light.castShadow = true;
    light.shadow.blurSamples = 30;
    light.shadow.radius = 12;

    const helper = new DirectionalLightHelper(light);

    scene.add(light);
    scene.add(helper);
}
Light 의 shadow 설정 시, 주의할 사항은 다음과 같습니다.
shadow.blurSamples: 값이 커질수록 부드러운 그림자를 표현하지만, 필요 성능이 높아집니다.shadow.radius: 값이 너무 작으면 화면이 깨지는 현상이 있으므로, 10 이상 설정을 권장합니다.
추가: VSMShadowMap 에 대하여
Soft Shadow 를 표현하기 위해 VSMShadowMaper 을 사용해 보았습니다.
VSMShadowMap 은 곡선에 대한 그림자를 부드럽게 표현할 수 있는 특징을 가졌습니다.
그래서 지금까지 실습했던 Shpere Mesh 의 그림자를 부드럽게 표현할 수 있었습니다.
만약 Sphere Mesh 가 아닌 Box Mesh 에 VSMShadowMap 을 적용한다면, 그림자가 드리우지 않아야 하는 영역까지 침범하는 현상을 볼 수 있습니다.
이는 VSMShadowMap 의 Blur 처리가 되면서 번지는 그림자가 렌더링된 결과 입니다.
화면 구성에 Box Mesh 가 많다면, VSMShadowMap 을 사용했을 때 오히려 지저분한 그림자가 만들어질 수 있다는 점을 고려하여 선택해야 합니다.

마치며
그림자는 조명과 물제의 상호연산을 사용하기 때문에 연산량이 많이 필요하다고 합니다.
그래서 그림자를 최소한으로 사용할 수 있도록 여러가지 설정을 분리시켜놓은 느낌이 들었습니다.
Three.js 를 활용할 때, 그림자 설정이 성능 최적화 대상이라는 것을 알게 되었습니다.